29 Apr The 20 steps of building a custom Gambino landscape lighting system
By Mike Gambino
 Depending on the type of construction and scale of the project the sequencing of different phases may vary slightly. I am writing about custom landscape lighting systems, because that is what we build. The steps of this system (a blueprint if you will) is the result of a culmination of 1,000’s of installs over a period of 22 years and is continuously tweaked and improved. So with that in mind here is a breakdown of the 20 step building system used on each and every custom Gambino landscape lighting systems built.
Once you have selected Gambino landscape lighting as your landscape lighting system builder and have secured a place in our construction schedule. The first step on installation day 1 is to layout the system on the ground. This is done by using marking flags at each fixture location. Transformer locations are established and transformers are mounted at those locations. Controllers are then interfaced with transformers. Next the sequencing of fixture wiring and routing of cable through the landscape from transformers to fixtures is decided.
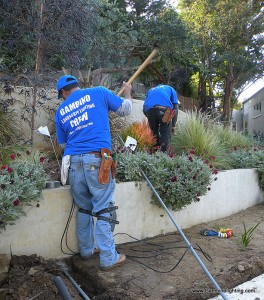
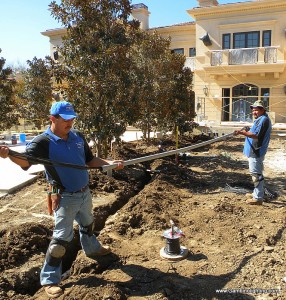
At this point the trenching process starts. The pipe trenches are dug usually 4 to 6 inches deep and major roots are excavated around and not cut to avoid damage to trees. In the event that sleeving needs to be installed under concrete that is accomplished as needed at this time.
After excavation of trenches, electrical conduit pipe is sized (leaving room for additional cable to be installed in the future) and all power cables that carry power from transformers to fixtures (these cables are called “homeruns” and are color coded for ease of identification during load balancing later) and from fixture to fixture are installed inside the conduit together at once.
 Once the cables are custom cut to size, they are placed inside conduit set into trench and soil is backfilled and leveled. The fixtures are then assembled and prepared and appropriate lamps are installed.
Fixtures are then installed at their locations. Lead wires from fixtures and power cable are stripped and then connected together with weatherproof connector kits. All non homerun wire splices are weatherproof sealed with a torch and bundled with cable ties and buried at the base of the fixture.
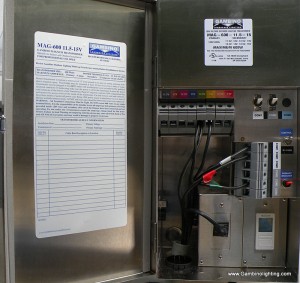
Once all of the power cables have been connected to the fixture leads and non homerun connections sealed and buried, the color coded “homerun” power cables are brought into the transformers, stripped and then connected to the power taps of the transformers.
Controllers are turned on to power transformers and turn on lights. Fixtures are inspected for proper operation. Each “homerun” cable is voltage tested and Cables inside transformers are moved to appropriate voltage taps as needed to provide between 11.5-12 volts at the first fixture on each run. Once the proper voltage has been provided to every homerun on the system the wires connected to each circuit breaker protected tap are amperage tested to prevent overloads.
 Homerun connections are then weatherproof sealed with a torch, cable is bundled with a cable tie and buried at the base of each fixture. Yard is cleaned up.
Walk thru with client and fixtures are adjusted as needed. Payment collected.
Here is a recap:
1-System Layout- Marking Flags placed at fixture locations
2-Transformers located and mounted
3-Controllers installed and interface with transformers
4-Sequencing of power cable between transformers and fixtures established
5-Cable routing through landscape established
6-Trenching, sleeves installed under walks or drives as needed
7-Homerun cables are color coded and conduit custom cut to size and set beside trench
8-Cables installed inside conduit and set in trench
9-Trenches backfilled and soil leveled
10-Fixtures assembled, prepared and appropriate lamps installed
11-Fixtures installed
12-Fixture and cable wires stripped and connected
13-Non homerun connections weatherproofed, cables bundled & buried below fixtures
14-Homerun wires connected to transformer lug taps
15-Controller switched on and all fixtures checked for proper operation
16-System is voltage load balanced and amperage tested with adjustments made at transformers and homerun fixtures
17-Homerun connections weatherproofed, bundled & buried below fixtures
18-Yard cleaned up
19- System Walk through and fixture adjustments made if needed
20- Payment balance collected
This landscape lighting blog is published by Mike Gambino of Gambino landscape lighting inc. all rights reserved. Mike is a professional landscape lighting system designer/ builder and has been designing, installing and maintaining landscape lighting systems for more than 20 years. Mike resides in the Los Angeles area with his wife and 2 sons. To visit his website go to www.gambinolighting.com . To inquire about hiring Mike please click here .
Blog articles may be published with permission on other websites without editing or removing links.


No Comments