

Lighting System Construction
-
Lighting Layout And First Inspection
We will notify you once we are prepared to start your project, and will be on your site within the following week to lay-out the landscape lighting system. We have found that pictures of our projects give clients a much better idea of our design than a written sketch or plan. While we are exceptional in this field and have dedicated our life to it and have 25 years of success behind us. Landscape Lighting is not an exact science and is highly subjective as to brightness levels, desirability of effects etc. What is spectacular to someone may not be acceptable to another.
We also have found that final decisions cannot be made until the client has actually seen the lighting live on their property at night. The lighting systems is laid out on site and fired up for the clients to see before anything is finalized. This guarantees that our clients are 100% satisfied with the end result. Our goal at this stage is to get all of the fixtures operating as soon as possible so we can begin receiving critical client feedback and adjust on the fly if needed.
-
Fixture Placement
 Fixtures that blend into their surroundings
Mike places flags where the fixtures are to go and he and his team begins conceptualizing how the conduit and cable is going to routed around obstacles such as concrete structure, roots, boulders and landscape amenities with the least disturbance possible. Homeruns (voltage test points) and distribution junctions in the system are determined and located.
-
Transformer’s And Switching System Placement
Mike and his head tech assemble and install transformers and switching controls and connect to the existing 120 volt electrical systems on the property.
The following procedures take place each day until all of the fixtures are working. All fixtures installed and connected that day are operational that same night for the client to see and provide feedback on.
-
Fixture And LED Assembly
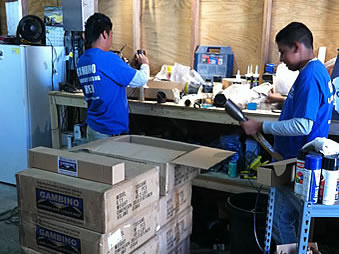
Fixtures and LED lamp modules are removed from their boxes and assembled. Final quality control fixture inspection is made by Gambino technicians. Once the LED lamp module is hard wired into each individual weather tight fixture, it’s brightness level is adjusted and proper optic placed. It is then closed up and handed off to Mike who brings it out to its location and is installed. Marking flags are removed except at voltage test point which make them easier to locate once the system has been fired up.
-
Cabling
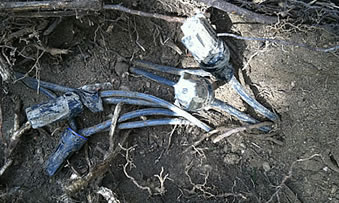 Poor Connections
Now that the fixtures, transformers and controls are in place, cable gauge size and routing locations are finalized. Main and feeder cables are rolled out on top of the ground and cut to size.
-
Connections
Now that all of the fixtures, transformers, controls and cable runs are in place the system is now ready for Gambino techs to connect all of the wires.
-
System Turned On And Electrically Adjusted And Balanced
System is turned on. Each fixture and LED is inspected to make sure it is on and operating properly. Voltage tests are then made at several key test points in the system. Adjustments are made at the transformers until all test points are adjusted to 12 volts or as close to 12 volts as possible. This will ensure predictable performance and best lamps life of the LED’s.
-
Client Feedback, Adjustments (If Needed) And Approval
On small systems all the lights may be functioning on the first night of construction. On larger jobs this process of getting all of the lights working at night may take several days or weeks. Every night there are new lights for the client to view and provide feedback on to Mike the next day. If needed, adjustments are made during the day based upon these critical client feedback and suggestions until the client is totally satisfied with the look.
-
Completion Of Build
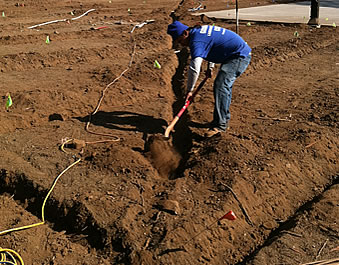
As soon as the client has approved the final look. Gambino technicians disconnect cables, roll them up and put them aside and then dig or slit trench the ground where cables are then placed into rigid PVC conduit of appropriate size and placed in the trenches and backfilled and leveled. Water is sprayed on the trenches to aid in the healing of the ground.
Cables are then reconnected. All throughout this process which may take several days there is no interruption of service and the lights are fully functional at night for the duration of this process which may take several days or weeks.
-
Substantial Completion Of Project
After the landscape lighting system cable is buried inside of conduit underground. connections have been closed and buried and final voltage readings have been taken and adjusted and documented and lights have been operating at night, the project is considered to be substantially complete and the final payment is due.